- From Text/CSV files
- From Excel files
- From Web data
- From Databases:
- Other methods
Prepare your data
Before you import files into Excel, you need to prepare the data so it’s clean and well-structured. Let’s see the things we need to go over below:
- Remove all blank rows and columns from your worksheet to keep the import process smooth. If you have any blank rows in your data set, it can lead to misalignment of the data and create unintended empty cells which can complicate data analysis.
- Remove any special characters in your data set as they can interfere with data parsing, cause misinterpretations or even affect formulas during the import process.
- Ensure consistent data type through a column as mixed data types can cause Excel to misinterpret data formats which can lead to incorrect import results. If a column contains text and numbers, the entire column will be treated as text when importing.
- Duplicate entries can skew analysis and lead to incorrect results. Duplicate customer records in a sales report can result in double counting the sales figure and distorting the overall analysis.
Import data into Excel
Once your data is perfectly organized, it’s time to import it to Excel. There is a huge variety of import methods depending on your data type 🤯
You can import data from files, online services, databases, Azure and other sources. However, we will discuss the four most commonly used import methods in detail.
We will use the following sample data set that we want to import to Excel.

Let’s explore each method one by one below.
From Text/CSV files
Text/CSV is the most popular import method and the easiest. CSV refers to comma comma-separated value which implies that while importing, commas are used to separate fields.
Let’s see how to use it 😀
Step 1) Open the Excel workbook.
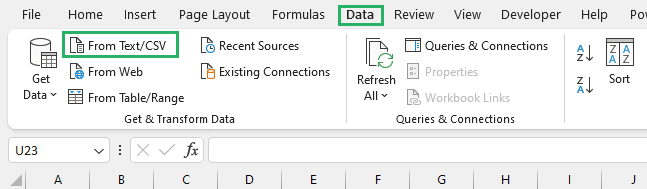
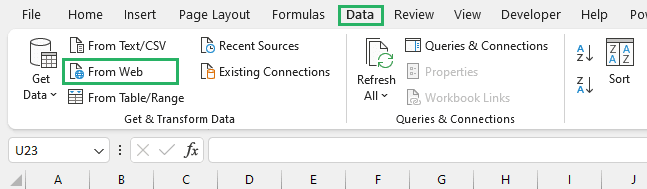
Step 2) Go to the Data tab on the ribbon and select From Text/CSV from the Get & Transform Data section.
Step 3) The Import Data dialog box will appear on the screen.
Step 4) Search and select the file you want to import into Excel.
Step 5) Click Import.
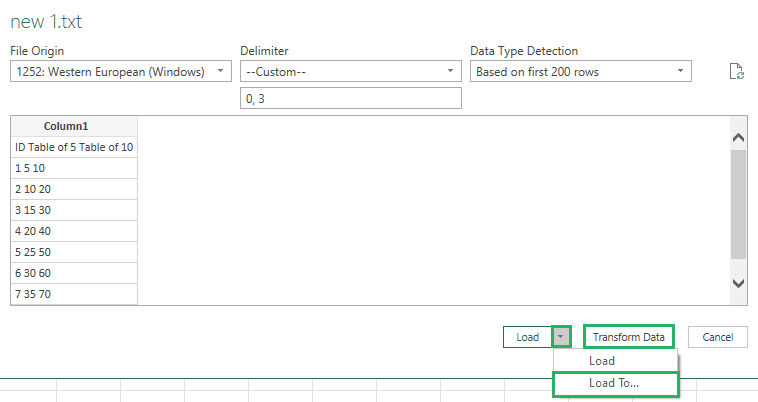
Step 6) A window will appear on the screen titled the name of the file you want to import.
Step 7) This is a preview window that shows how data from the selected file will appear in Excel.
Step 8) The File Origin remains intact.
Step 9) If you are fine with how the data looks, click the Load button.
The data from the file will be loaded into a new worksheet in the Excel workbook 📗

However, if you want the data to appear in a Pivot table or Pivotchart or the same worksheet,
Step 10) Click the small down arrow next to Load and select Load to.
Pro tip
Notice the Transform button next to Load? It opens a special window with a variety of features – we will explore that later in the article.
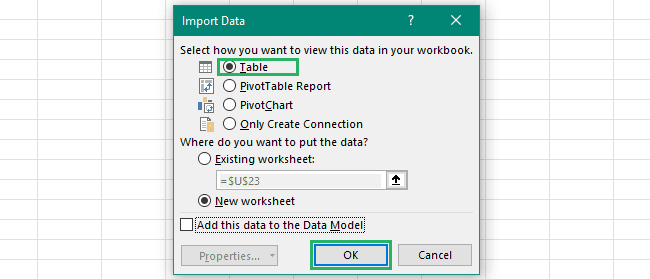
Step 11) A small dialog box will appear on the screen.
Step 12) Select the option you want and press Ok 👍
The data will be displayed in the chosen format.
Now comes the Transform button – it lets you take things to an advanced level. It opens up the Power Query editor with the imported data in the window.
Power Query is a powerful editor that lets you clean and transform your data in a couple of clicks. It allows you to find and remove special characters, ensure data consistency and check delimiter usage.

You can transform your data using the options given in the window as you like 😀
Pro tip
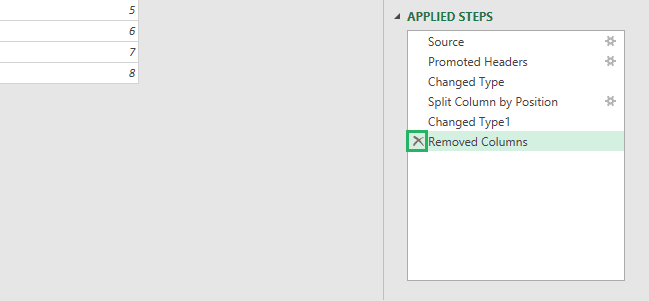
The CTRL + Z option doesn’t work in Power Query. Instead, you can see the changes made in the Applied Steps box on the right side of the window. You can undo the changes made by clicking the cross button at the left of the step.
Once done, load the file to Excel.
Step 13) Go to the Home tab on the Power Query editor and select Close & Load from the Close section.
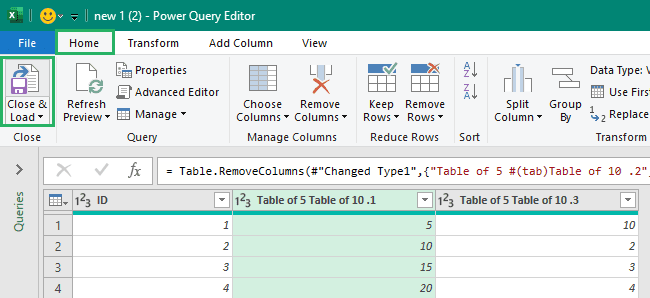
And tada! It’s done. The data will be imported to a new Excel sheet as:
How cool is that? 😎
From Excel files
To import an Excel file,
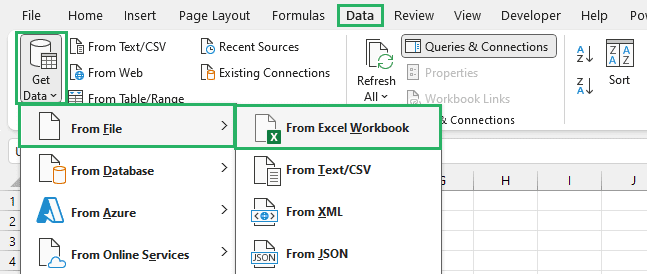
Step 1) Go to the data tab and select Get Data from the Get & Transform Data section.
Step 2) Select From File and From Excel Workbook from the list.
Step 3) Locate and select the workbook you want to import.
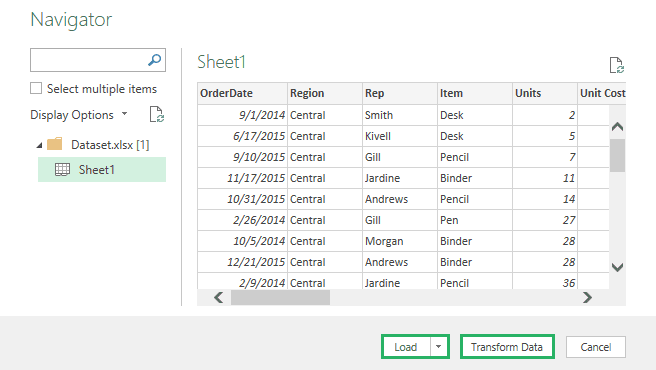
Step 4) The Navigator window will open up.
Step 5) Select Load to insert the data into the worksheet or Transform to make changes to the data.
Data from the imported Excel file will appear in your worksheet as:
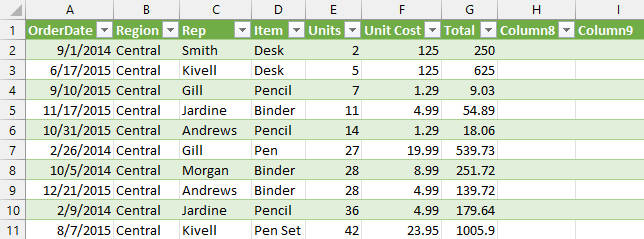
Wasn’t that easy? 🤓
From Web data
To import data from a website,
Step 1) Go to the data tab and select From Web from the Get & Transform Data section.
Step 2) Enter the URL of the webpage containing the data you want to import.

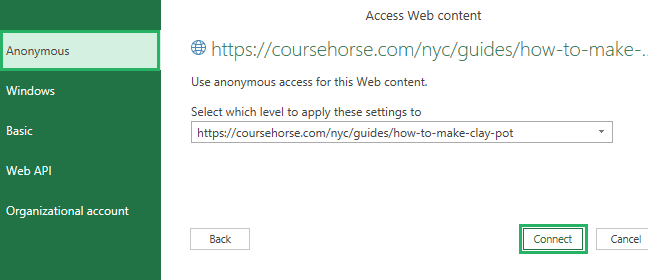
Step 3) An Access Web content window will pop up with options on how you want to access the webpage – we chose Anonymous but you can choose to sign up with your credentials too.
Step 4) Press Connect.
Step 5) Once Excel establishes a connection with the website, the Navigator will load up.
Step 6) It has the Table View and the Web View – you can switch between the two to see all the data on the website.
Step 7) Select the items you want to insert in the Worksheet and press Load or Transform to make changes to the data.

Data from the webpage will appear in your worksheet as:

How fun was that? 😉
From Databases:
To import a database,
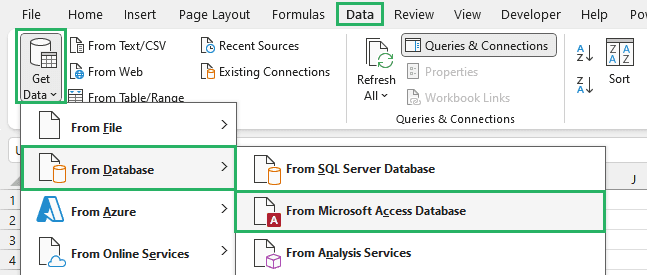
Step 1) Go to the data tab and select Get Data from the Get & Transform Data section.
Step 2) Select From Database and specify the database type – we chose Microsoft Access.
Step 3) Locate and select the file you want to import.
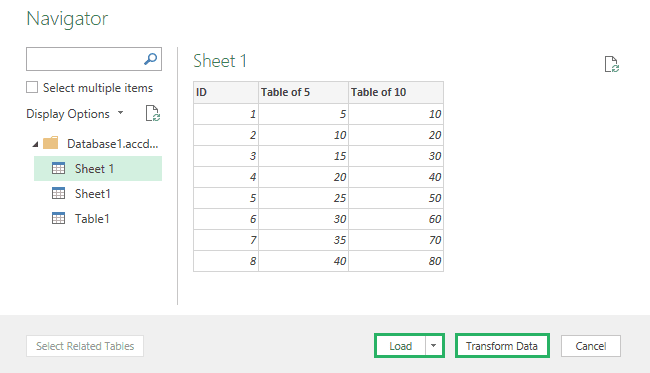
Step 4) The Navigator window will open up.
Step 5) Select the sheet you want to import or select multiple items.
Step 6) Press Load to insert the data into the worksheet or Transform to open the Power Query editor and make changes to the data.
Data from the database will appear in your worksheet as:

Other methods
From Azure
Access and analyze your cloud stored data directly within Excel leveraging Azure’s power. The process is the same as seen above.
Access a variety of Azure services from the Get Data option in the Get & Transform Data section. Enter the necessary connection details and credentials and it’s done 😃
From Online Services
Connect to a variety of online services like OneDrive SharePoint, Power BI and more. Select it from the Get Data option, give a couple of permissions and you can import the data.
Troubleshoot errors
Errors are to be expected when importing data into Excel – even the slightest negligence can mess up your entire data set. Let’s see what these are below and how you can fix them 🔧
- Formatting issues such as hidden or merged cells can cause problems. Make sure your data is clean and properly organized.
- If your web data is not well structured or consistent, use power query to fix it.
- If the data on the web page changes periodically, use a web scraping tool.
- Make sure the connection details entered are correct and the data is well-maintained and free of corruption when loading the database.
- Extra spaces or special characters can cause an Excel file to disrupt the smooth process – use Excel’s TRIM function to eliminate unwanted spaces.
- Misalignment of column headers can create problems in the Excel file. Make sure that the Excel file’s column headers match with the field names.
- If the import breaks up because of the size limit, break the import files into smaller ones. Moreover, it is recommended to import files with rows less than 10,000 to avoid disruptions.
Conclusion
In this guide, we saw how to import data into Microsoft Excel. We learned the use of Text/CSV, web and database methods and how to get the maximum of it 💪
Preparing your data beforehand, selecting the right method, and cleaning the data can significantly reduce the risk of errors.
The process can be further streamlined with Excel’s Power Query, Text to Columns and Data Validation features. With these practices, you can improve the quality of your analysis and save time
To learn more about importing and embedding documents in Excel, try the following articles:
We hope this article helped you import that Excel file without errors 🤗